


Home Assistant set up VM Wi-Fi connection via CLI
2026-04-20 – Agron Merseli
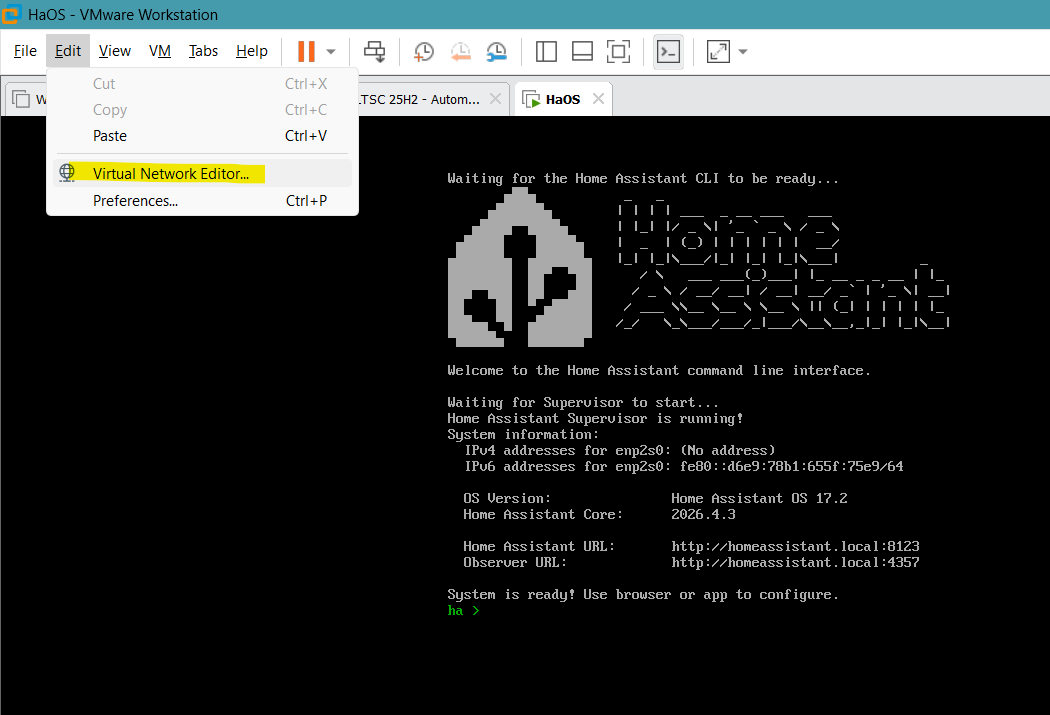
Open Virtual Network Editor from VMware Workstation.
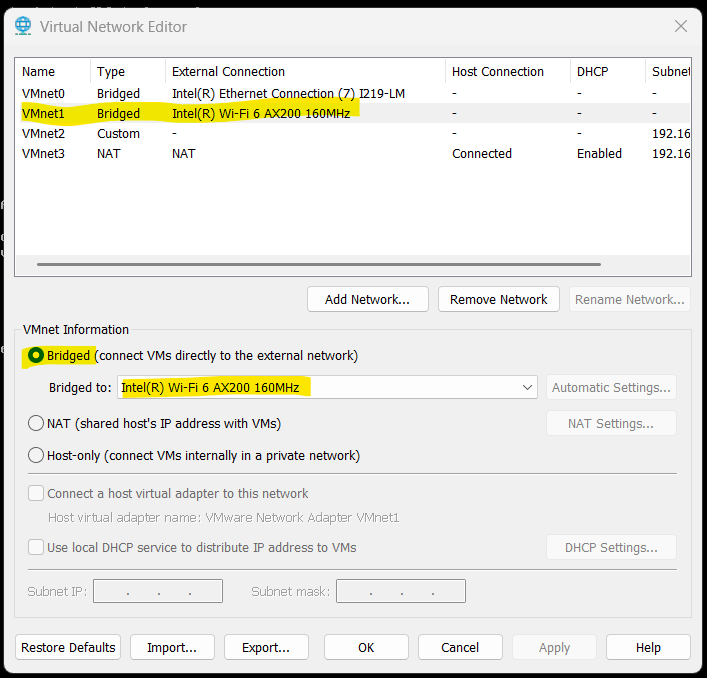
Set up the network as bridged to the Wi-Fi card.
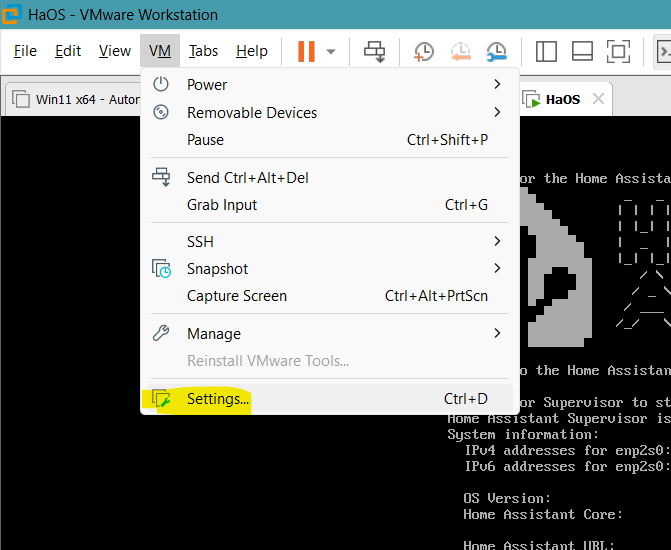
Enter the VM settings.
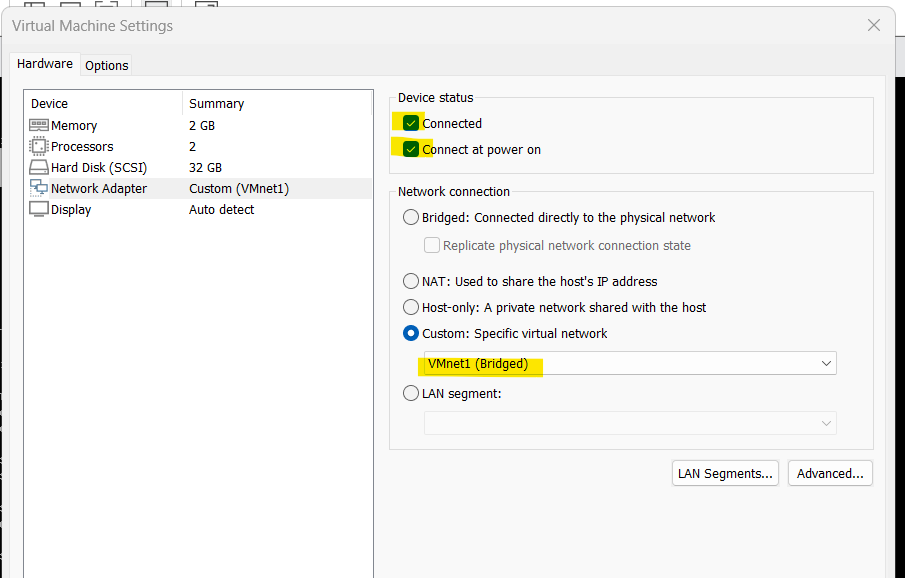
Select the virtual network.
Restart the machine.
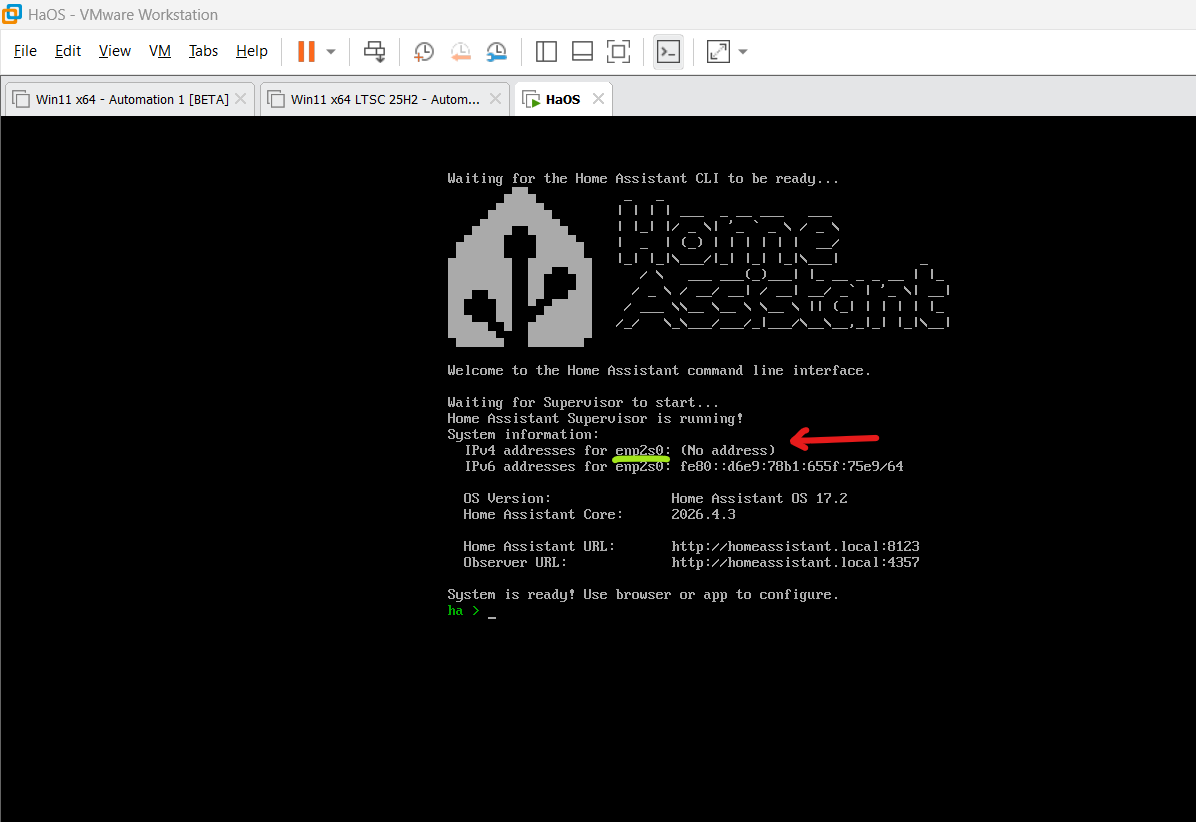
Check if the router has not give any ip address.
Note the name of the network interface, in this case is enp2s0, this will not change also if you move the Vm to another machine.
Now type the follow lines to permit to HA to connect to the existing Wi-Fi connection.
network infoCheck if network interface has no ip
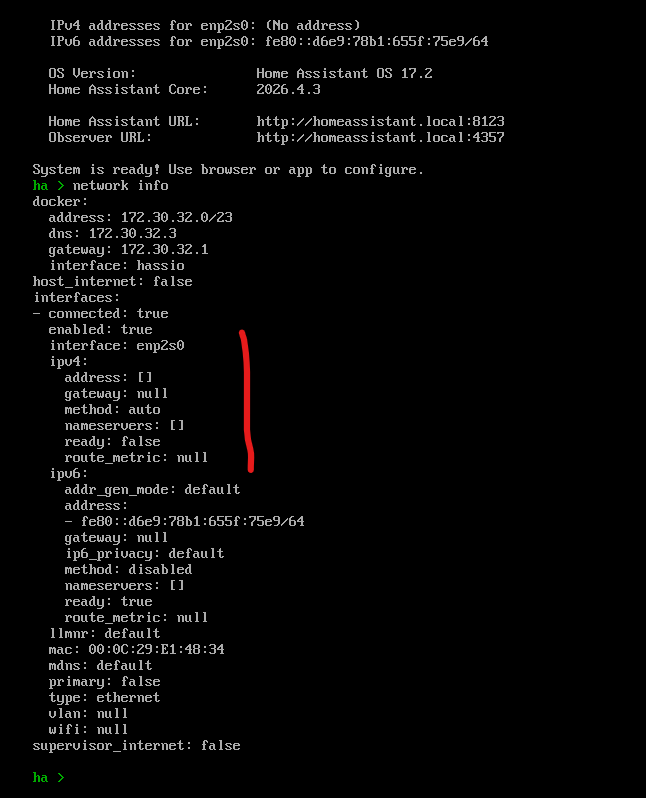
Now type the following command (remember to rename the interface)
network update enp2s0 --ipv4-method auto --ipv6-method disabled
This means the IPv6 is disabled you need only IPv4 set to auto that means DHCP.
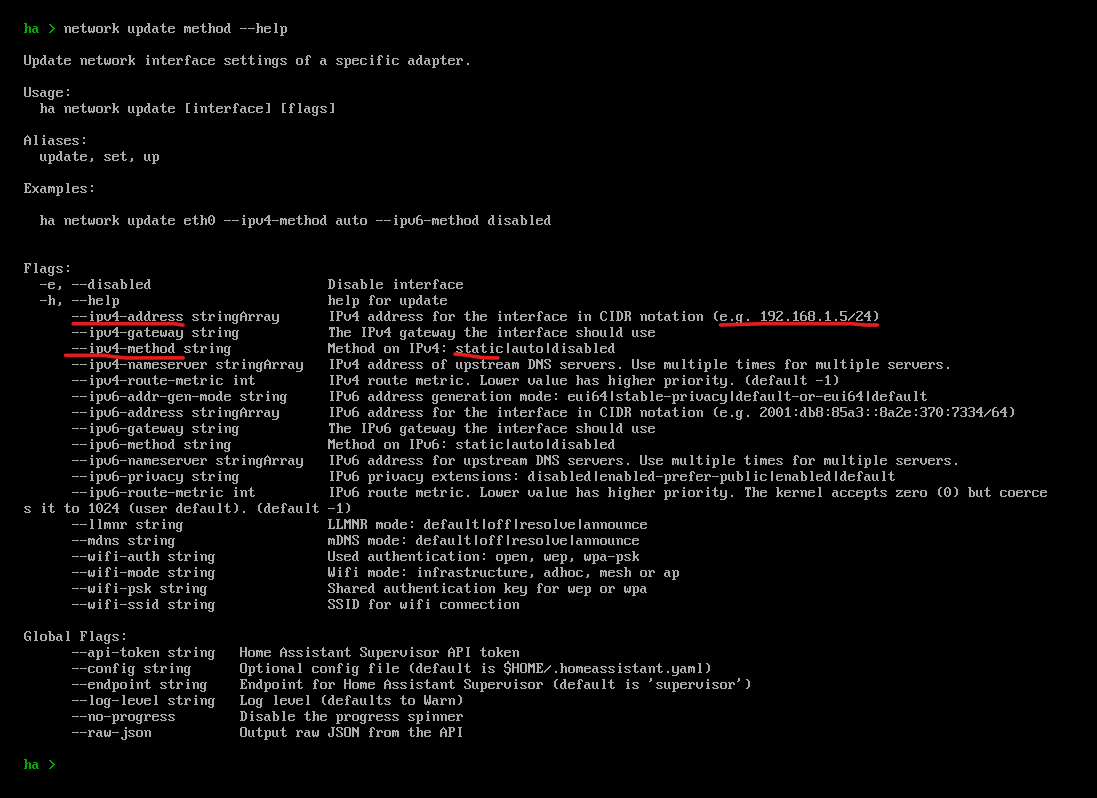
If you need to set up a fixed IP you need to set method static and set the ip address, using the highlighted commands.
Finally you have to set the Wi-Fi SSID and Wi-Fi password using the following command.
Remember to change the network interface, name SSID and password.
network update enp2s0 --wifi-auth wpa-psk --wifi-ssid WIFIXYZ123 --wifi-psk pwdwifi123After that type
exitto return the the top of the CLI.
And check ip the router has give a new ip address to the HA server.
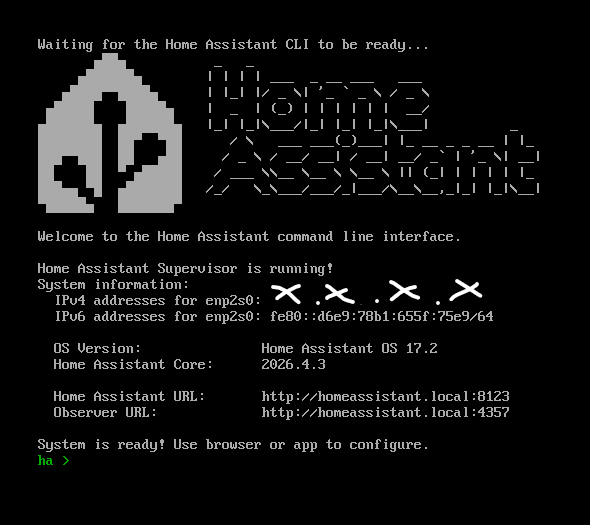
Finally you can enter the webserver running locally at the following address.
http://homeassistant.local:8123or, using the actual ip:
http://192.168.X.Y:8123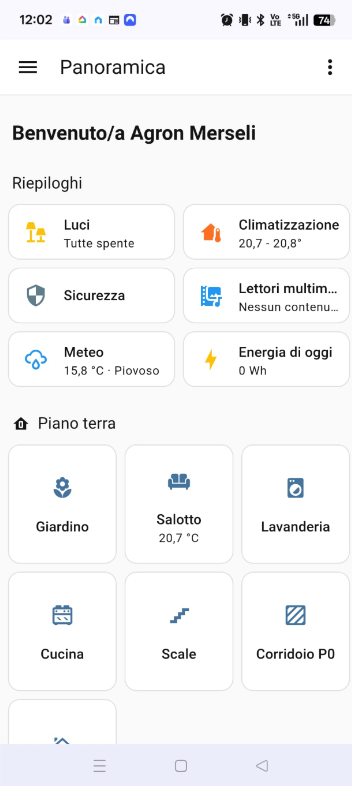

- L'IA può portare all'estinzione, l'allerta di decine di ricercatori 2023-05-30Tra i firmatari gli ad di OpenAI e Google Deepmind, ci sono anche italiani tra cui l'esperto di tecnologie dell'informazione Luca Simoncini
- Le fake-news diffuse dai pregiudizi, non dai motori di ricerca 2023-05-30Lo indica uno studio condotto su Google
- L'e-commerce in Italia vale 54 miliardi nel 2023 2023-05-30Fondazione sostenibilità digitale: "Acquisti in aumento del 13%"
- OpenAI, fondo da 1 milione di dollari per regolamentare l'IA 2023-05-30Lo sviluppatore di ChatGpt sovvenziona ricercatori e aziende
- Apple risarcirà proprietari di MacBook per le tastiere difettose 2023-05-30Giudice Usa ha dato via libera all'intesa da 50 milioni di dollari